Network Booting
Tonight on Izzy’s Lab we set up a PXE server to netboot Linux Mint live images, workplace health and safety mandates warning tape on our computers, and I lose my mind over removable media.
I hate removable media. Flash drives, CDs, DVDs, external hard drives. All of it. If it’s not painfully slow, it’s unreliable, or just a pain to manage. In an ideal world I’d never touch one again. All data transfer would occur over my local network, via sane and well-understood protocols like SFTP. I almost live in that world: The only device I have that I can’t pull data off of over IP is my camera, and technically there is an addon that would let me do so.
But there is a problem: doing this usually requires having the right software installed on both ends, and the usual way one starts putting software onto a computer is with removable media. My perfect world comes crashing down every time I have to set up a computer - and I have about twenty to worry about at this point.
This begs the question: What if there’s a better way? What if I can install software on computers without using removable media? What if the repetitive questions could be automated? What if it could be done … over a network?
Thankfully, there is a way: We can boot the installer image over the network using PXE and HTTP, then have it load a configuration file to automate the installation.
Part zero: Background information
But. Let’s go over some terms and background information before we get stuck into the job.
DHCP
DHCP stands for Dynamic Host Configuration Protocol and is, generally speaking, how your computer gets its local network address. There’s one or more servers that listen for “give me an address!” requests, and respond with an address from their allocated range of addresses they can hand out. On small networks it will typically be a router acting as the DHCP server, but on larger networks you might find dedicated DHCP servers. DHCP will generally provide clients with their address, the address of the network’s main gateway, a set of preferred DNS servers, and sometimes netboot information.
PXE
PXE, colloquially known as Pixie, is a standard for booting computers over a network. The exact details aren’t terribly important for our task today, and the basic idea is that if your network card supports PXE, it can use the information from DHCP to load a program, called Network Boot Program, from a TFTP server.
TFTP
Which brings us to the Trivial File Transfer Protocol. TFTP is a dumb-as-rocks protocol for grabbing files from a server. It’s designed to be really easy to implement, as you only need to implement half of a network stack to use TFTP.
BIOS & UEFI
These two get mentioned together because they perform the same role. The BIOS is the traditional firmware of an x86-based computer. It’s responsible for starting the computer, waking up the internal components, and loading the bootloader from storage. UEFI does all of that, but it also supports bigger disks, has a command-line interface for running executables, and contains a good portion of the win32 API for application development. Thinking about it, it’s a bit like MS-DOS with some Windows 3 sprinkles, but for modern 64-bit computers. I’m getting off track there, but another important task both of them do is load “option ROMs,” which are basically programs included with your hardware that runs at boot. A good example of this is the PXE client included on most network cards.
Part one: The PXE server
Before we can boot anything over the network, we need something to provide the files to boot. You’re not going to believe this, but to do that I’ve written an ansible playbook - proxmox-pxe.
The proxmox-pxe playbook
It’s the same structure we’ve gone over before - create a Debian container in Proxmox, apply some roles, the usual. There’s one unusual part I’ll mention now: Mounting the RAID array to the container, so it can find the OS images.
This is mostly copied from my samba playbook - we’ll get there soon enough - so if the Proxmox host has a filesystem mounted on /mnt/export, it will make sure that that filesystem allows modification by the in-container root user, and then attach it to the container with the pct command.
- name: Configure /export
     block:
     - name: Configure mount point
       file:
         path: "/mnt/export"
         state: directory
         owner: 100000
         group: 100000
     - name: Configure container image mountpoint
       command: "pct set {{ container_info['vmid'] }} -mp0 /mnt/export/public/OS,mp=/mnt/os"
     when: ansible_mounts | selectattr('mount', 'equalto', '/mnt/export') | list | length > 0
The pxe role
Now that that’s out of the way, the first role we’re interested in is the pxe role, which will, in order, install the necessary packages to run a PXE server, set up dnsmasq to serve files over TFTP, configure GRUB to provide a menu of all our netbootable operating systems, and unpack said operating systems in a way that can be served by dnsmasq and nginx.
So, we install dnsmasq, GRUB for both 32-bit and 64-bit x86 systems - I haven’t got any ARM systems to play with, and my only PowerPC machine is a few hundred K’s away, unfortunately - as well as 7zip and rsync, which will be used for unpacking ISO images.
- name: Install packages
  apt:
    name:
      - dnsmasq
      - grub-efi-amd64-signed
      - grub-pc
      - p7zip-full
      - rsync
    state: present
    install_recommends: false
Then we create /var/tftp, owned by root but readable by all.
- name: Create tftp directory
  file:
    path: /var/tftp
    state: directory
    owner: root
    group: root
    mode: "755"
To serve files over TFTP, we’ll set up dnsmasq with this extensive four-line configuration file. It really doesn’t even need to use the template module for this, but I figure maybe one day I’ll have a use for it.
- name: Template dnsmasq configuration
  template:
    src: dnsmasq.conf.j2
    dest: /etc/dnsmasq.conf
    owner: root
    group: root
    mode: "644"
dnsmasq.conf.j2:
# Enable dnsmasq's built-in TFTP server
enable-tftp
# Set the root directory for files available via FTP.
tftp-root=/var/tftp
As for what dnsmasq will be serving, we’ll be using the GRUB bootloader. The traditional option for this task is the pxelinux variant of syslinux, but I found GRUB was actually more straightforward to set up for this.
As such, we’ll generate the 32-bit GRUB PXE image, telling it to look in grub under the root directory of the TFTP server for it’s configuration and modules.
On the other hand, the 64-bit signed EFI executable shipped with the Debian copy of GRUB is already configured, so we’ll just borrow that.
- name: Generate i386-pc-pxe bootloader
  command:
    cmd: "grub-mkimage -d /usr/lib/grub/i386-pc/ -O i386-pc-pxe -o /var/tftp/booti386.img -p '/grub' pxe tftp"
- name: Copy amd64-EFI bootloader
  copy:
    src: "/usr/lib/grub/x86_64-efi-signed/grubnetx64.efi.signed"
    dest: "/var/tftp/bootx64.efi"
    owner: root
    group: root
    mode: "644"
The 32-bit image is not an all-in-one image, so we copy the GRUB modules to the aforementioned grub directory for it, after creating it. Note that we include module files and directories, but exclude everything else.
- name: Create grub directory
  file:
    path: /var/tftp/grub
    state: directory
    owner: root
    group: root
    mode: "755"
- name: Copy i386-pc modules
  synchronize:
    src: "/usr/lib/grub/i386-pc/"
    dest: "/var/tftp/grub/i386-pc/"
    rsync_opts:
    - '--include=*.mod'
    - '--include=*/'
    - '--exclude=*'
Finally, we need to create the configuration file for GRUB. This will go in the directory we just set up, and will use the grub.cfg.j2 jinja2 template.
- name: Template grub.cfg
  template:
    src: grub.cfg.j2
    dest: "/var/tftp/grub/grub.cfg"
    owner: root
    group: root
    mode: "644"
The GRUB configuration is kind of a lot, but they’re typically a lot more so let’s get into it from the top.
if test "${grub_platform}" = "pc"; then
 insmod linux
fi
First, it checks if GRUB is currently on the “pc” platform - that is, 32-bit x86, and if it is, it loads the Linux module. The 64-bit version, as established, has all of these modules built in.
{% for item in pxe_images | dict2items %}
menuentry "{{ item.value.label }}" {
 set gfxpayload=keep
 linux /{{ item.key }}/{{ item.value.kernel }} {{ item.value.args }}
 initrd /{{ item.key }}/{{ item.value.initrd }}
}
Then, there’s a loop within the jinja2 template, iterating over the pxe_images dictionary. For each item within, it creates a menu entry with the label as specified. That entry will attempt to load a Linux kernel, with arguments as specified, and initial RAM disk, from within the directory matching the item’s name.
This doesn’t make a lot of sense without an example of such an item within the pxe_images dictionary.
mint:
  label: "Linux Mint 22"
  image: "/mnt/os/Linux/linuxmint-22-xfce-64bit.iso"
  files:
  - "casper/vmlinuz"
  - "casper/initrd.lz"
  args: "boot=casper initrd=/casper/initrd.lz username=mint hostname=mint quiet splash ip=dhcp netboot=url url=http://{{ inventory_hostname }}/os/Linux/linuxmint-22-xfce-64bit.iso --"
  kernel: "vmlinuz"
  initrd: "initrd.lz"
From this we can see that this mint entry will use the label will be Linux Mint 22, it will use a kernel named vmlinuz and an initial RAM disk named initrd.lz. It also provides a lot of arguments. To understand them, we need to know a little bit about how the live images of Debian and derivatives boot.
Specifically, they use a utility named casper, which I will not pretend to fully understand, but I do know it’s quite flexible: It can boot a live system from a CD, DVD, flash drive, or over the network, then slap a RAM disk over the top so it can pretend that you have a live, writeable system, rather than a read-only installer image.
The most important things we’re telling casper are that the system should get it’s IP address via DHCP, with the ip=dhcp option, that we’re netbooting from a URL with the netboot=url option, and where to find the image to netboot. We’re using templating to provide that URL, but summarily, it will be served from the PXE server by nginx.
Here’s an example of a menu entry I prepared earlier. As you can see, it’s subtituted in all the names and paths - and the hostname of the PXE server - into the template.
menuentry "Linux Mint 22" {
 set gfxpayload=keep
 linux /mint/vmlinuz boot=casper initrd=/casper/initrd.lz username=mint hostname=mint quiet splash ip=dhcp netboot=url url=http://pxe.uranus.sks.lan/os/Linux/linuxmint-22-xfce-64bit.iso --
 initrd /mint/initrd.lz
}
To keep everything tidy, we’ll make a directory for the files from each ISO image. To do that, this task loops over the pxe_images dictionary, creating a directory with the name of each entry.
- name: Create distribution subdirectories
  file:
    state: directory
    path: "/var/tftp/{{ item.key }}"
    owner: root
    group: root
    mode: "755"
  loop: "{{ pxe_images | dict2items }}"
Once we’ve made those directories, we extract only the files we need from the ISO images and place them into the right directories.
- name: Extract distribution files
  community.general.iso_extract:
    image: "{{ item.value.image }}"
    dest: "/var/tftp/{{ item.key }}"
    files: "{{ item.value.files }}"
  loop: "{{ pxe_images | dict2items }}"
As I touched on at the start, we’re using nginx to serve files as well as dnsmasq. We’ve set that up before in other videos, so here’s the important part: It will serve /var/tftp as the document root, and the contents of /mnt/os under the os directory. When we set up the container, we mounted the part of the RAID array with our operating system images into the container as /mnt/os.
server {
  listen 80 default_server;
  root /var/tftp;
  location /os {
    alias /mnt/os/;
    index index.html;
    autoindex on;
  }
}
Part two: DHCP server
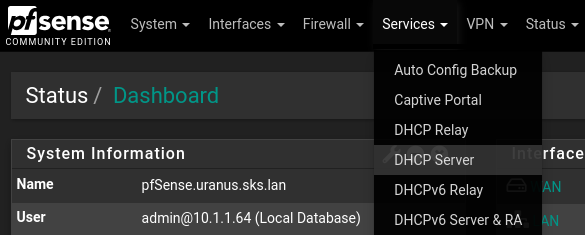
For clients to actually find the files, we need to configure our DHCP server to inform them of the address. I’m using pfSense for DHCP, and under the Services menu I can find the DHCP Server entry.
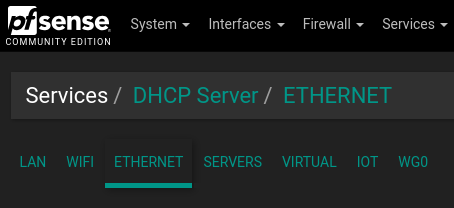
I then select the right interface from the tabs along the top.
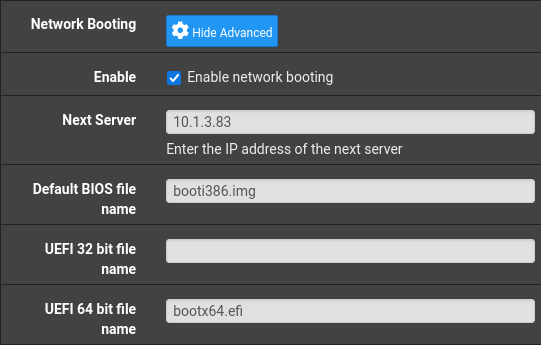
For netboot, I need to scroll down to the Network Booting section. Display Advanced will reveal the options I need to fill in.
First I need to check Enable network booting, then I can fill in the Next Server with the IP address of the PXE container we just set up - 10.1.3.83 in my case. Finally, we need to fill in the default file names to match the GRUB images we started serving previously. - booti386.img for BIOS systems, and bootx64.efi for 64-bit UEFI systems.
Then we can Save the configuration, and it should be ready to go!
Part three: A normal Mint install
With all that complete, we can do a normal, manual Mint install, with the installer loaded over the network, to test our PXE infrastructure. On my machine, I need to hold F12 while the machine boots to get to the network boot menu.
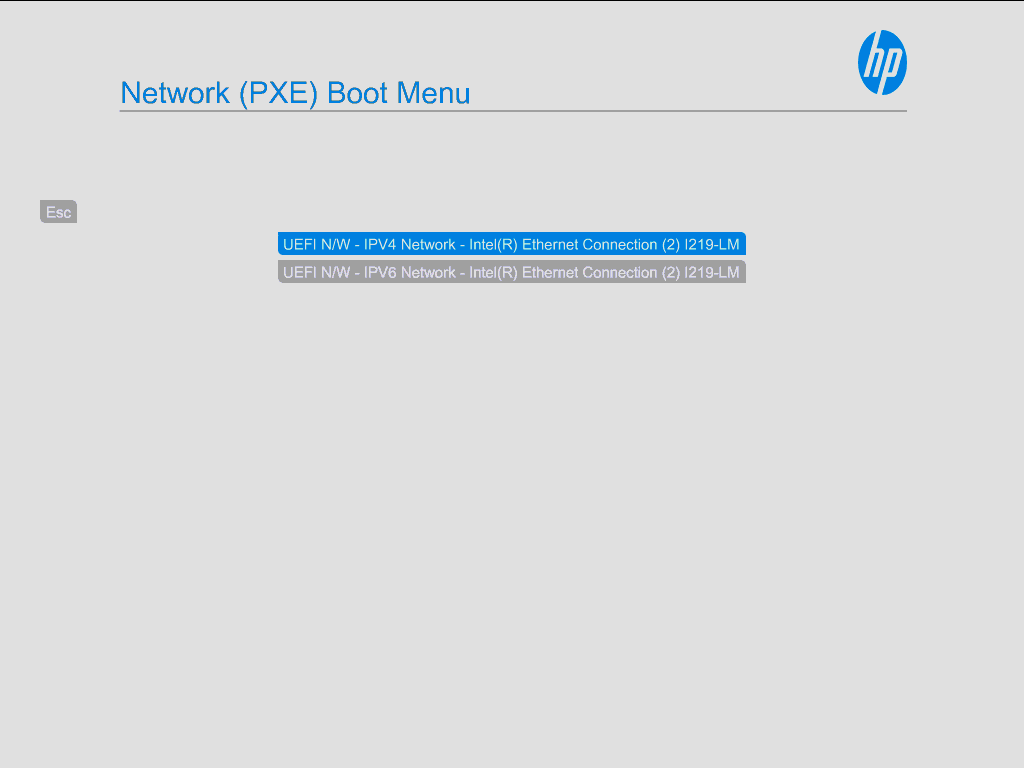
If I select IPv4, it will load our network boot program, GRUB, over the network.
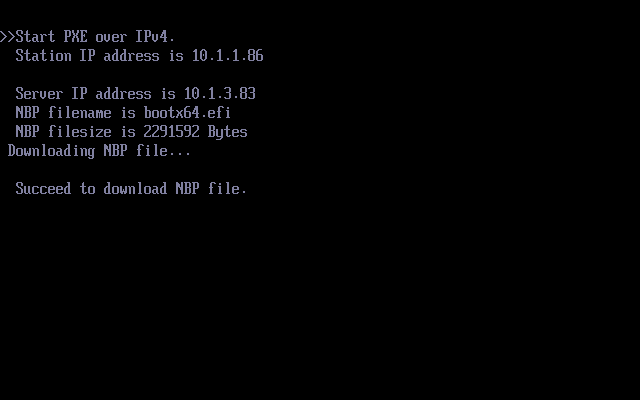
Once it’s loaded, we’ll get the GRUB menu, with the menu entry we set up.

We can select that entry by pressing Enter and in about a minute, it will show us the desktop, with the usual ‘Install Linux Mint’ icon in the top right.
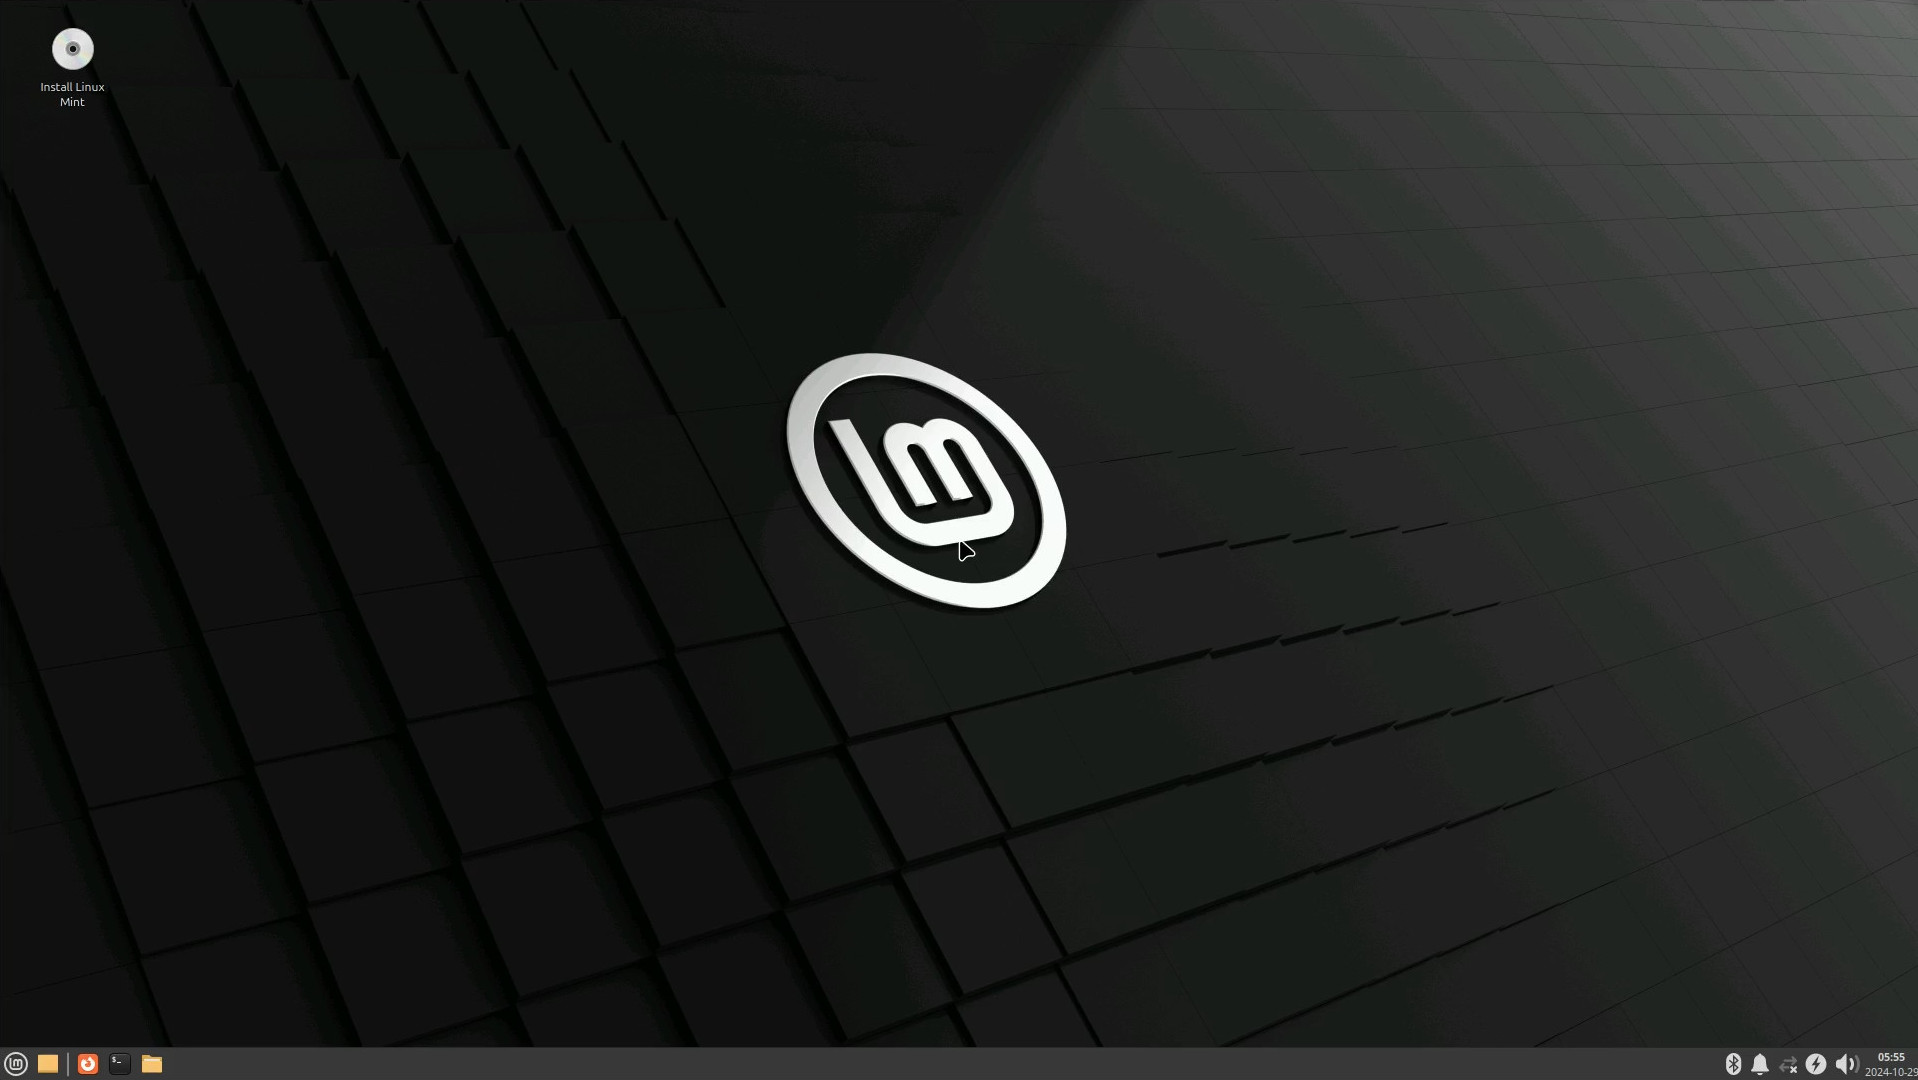
We could use the live system to do maintenance if we needed to, but we’re interested in the installer today, so let’s run that, paying special attention to the questions it asks.
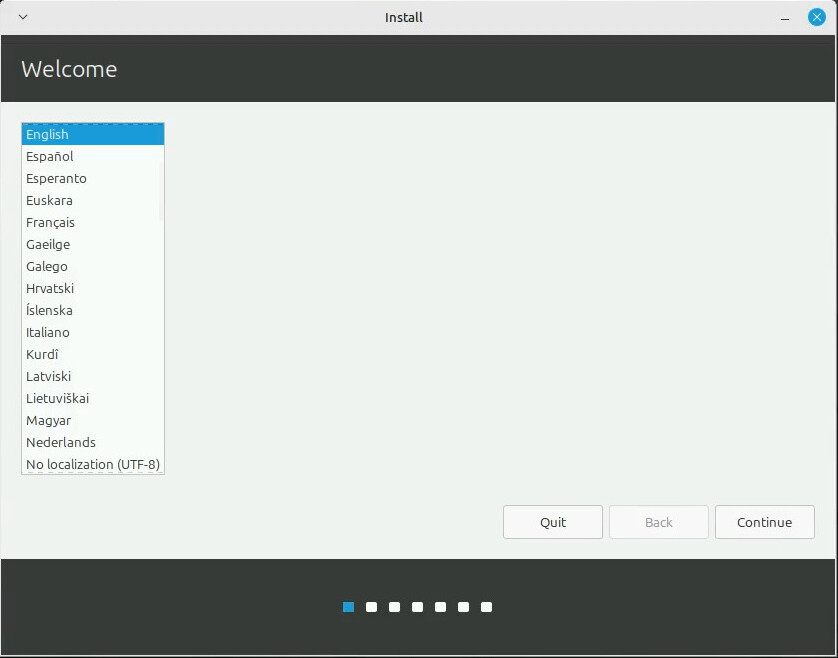
The first question it will ask is the language to install in, and I personally speak English, so we’ll go with that.
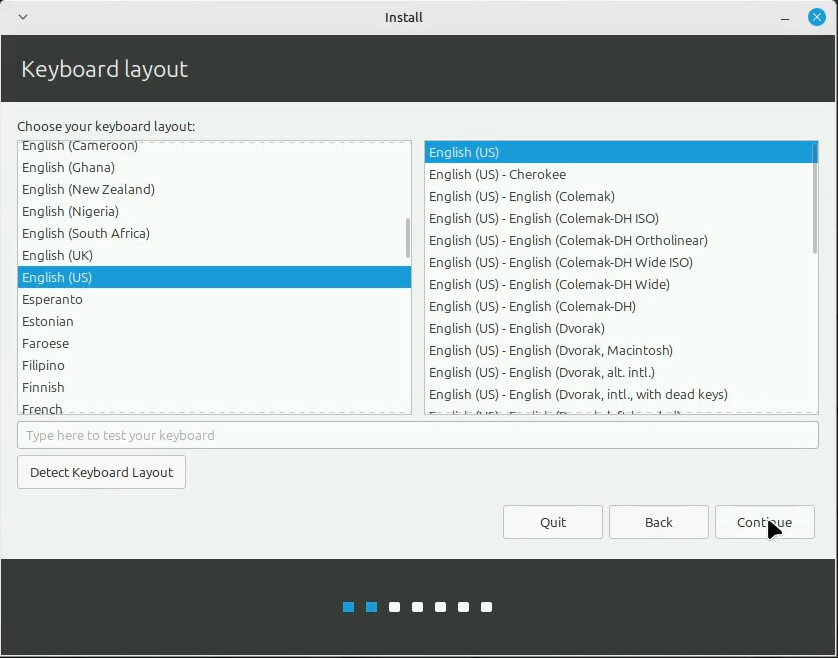
I’m also using a standard US ANSI keyboard, so I’ll select that on the next page asking about keyboard layouts.
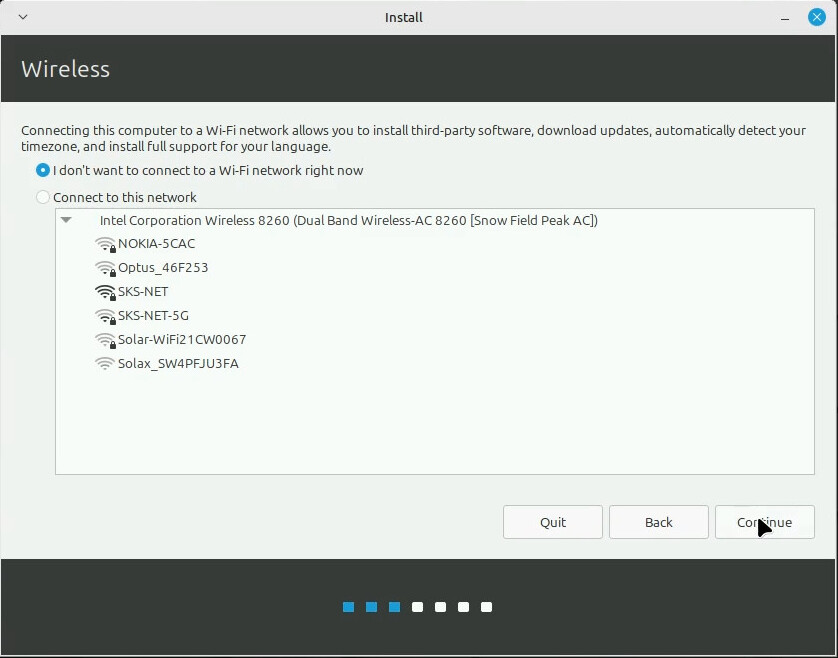
When you netboot Mint, it sets up the network connection before NetworkManager starts, so it thinks we’re not connected, and offers to let us connect to some WiFi networks. This wouldn’t occur if you booted the installer normally and are connected to ethernet, but it’s fine. We can just skip this question.
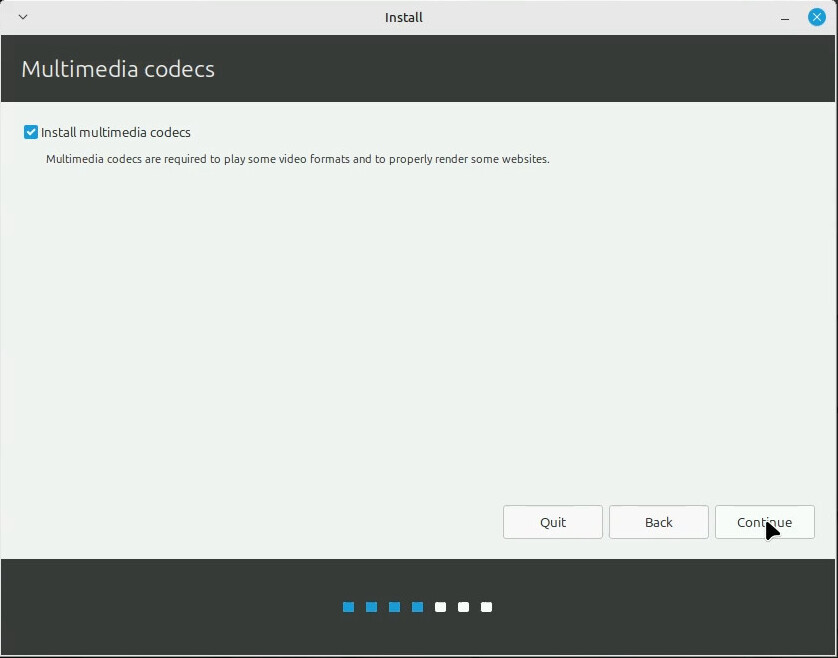
The next page after that is about multimedia codecs, and I do want those installed.
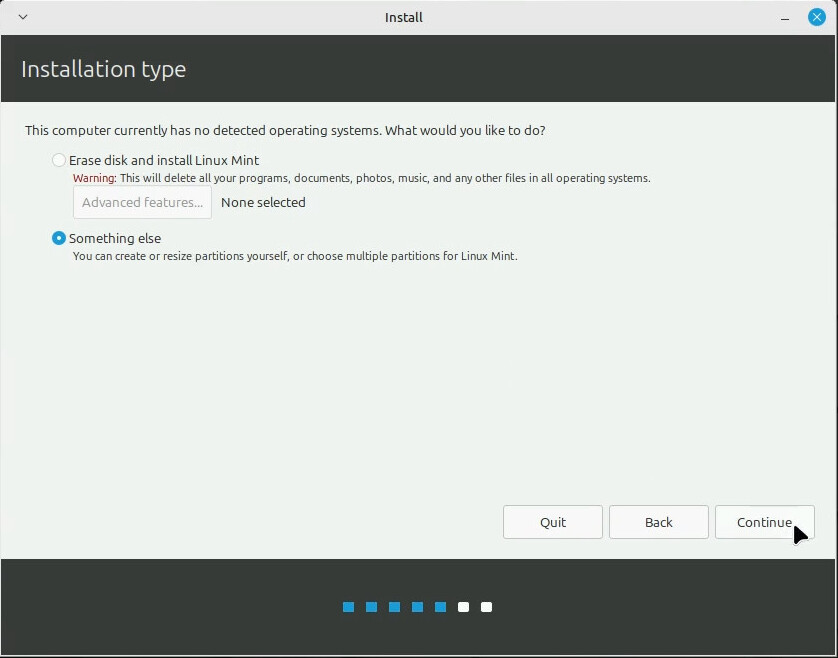
The next page is about what to do with disk partitioning. My demo machine only has an SSD, so to avoid it making a swap partition on the SSD, I’m going to select “Something Else” to get to the manual partitioning page.
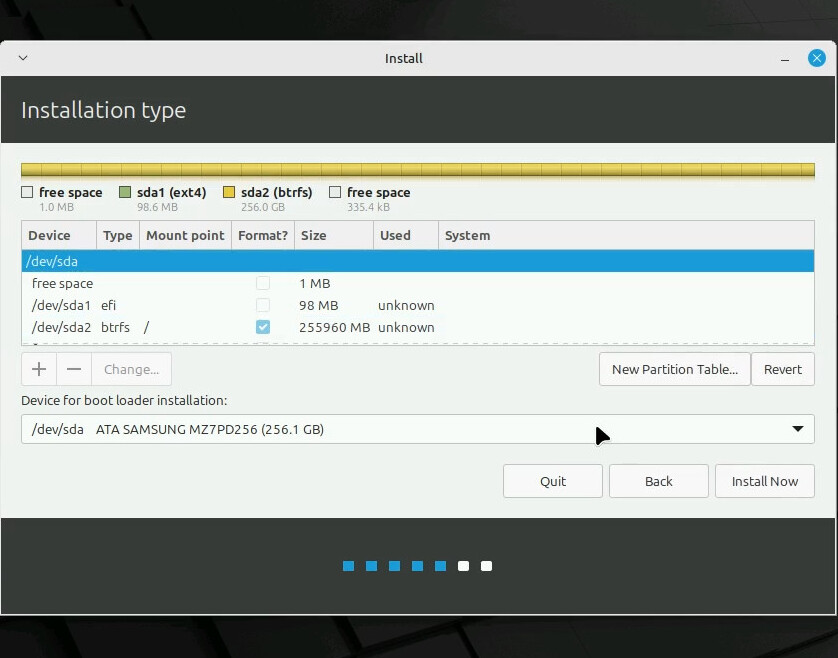
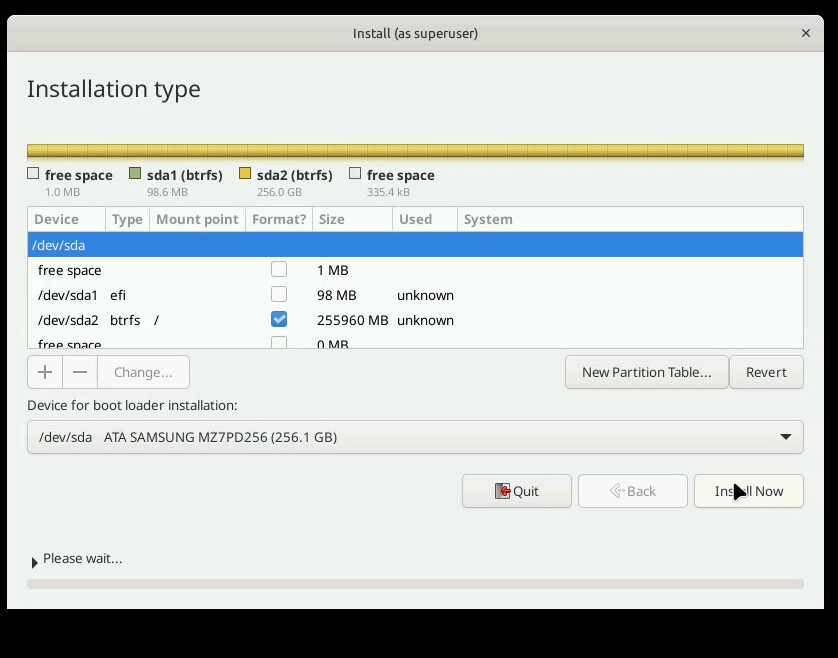
On the next page, I’ll partition the disk with a 100MiB EFI system partition, and use the rest of the space for a btrfs root filesystem.
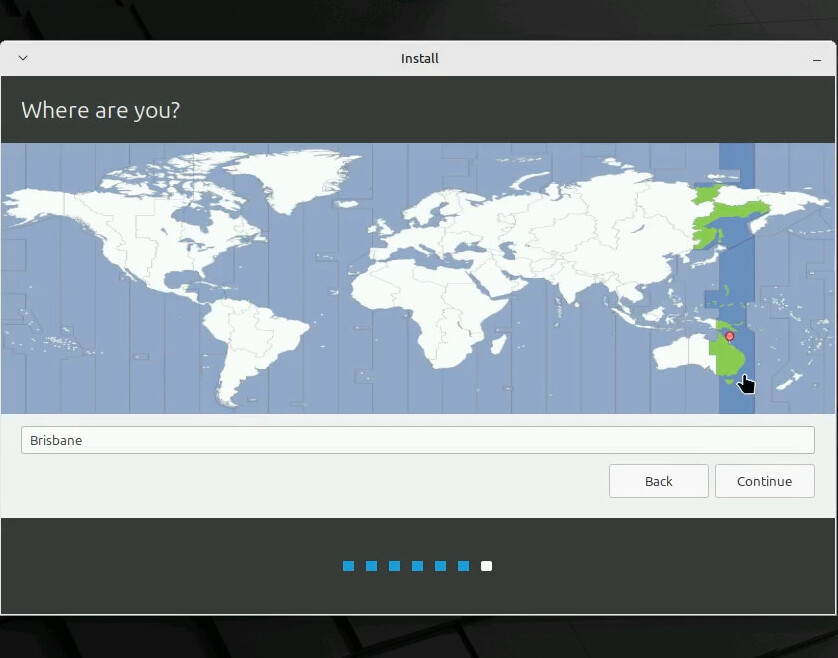
The next page asks us to pick our timezone, so I’ll select Brisbane.
The last set of questions is the computer’s hostname and the initial user’s info. I’ll be setting up LDAP login later using an Ansible playbook we’ve covered before, but I do need to fill something in here, so I’ll use what my playbook expects.
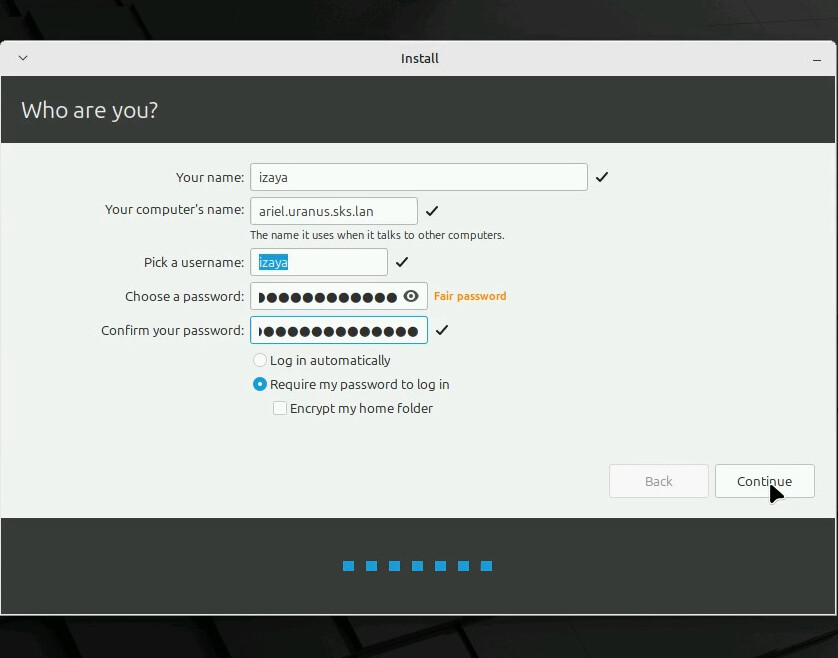
That was eight pages of questions, containing 11 questions plus disk partitioning. Not awful, and I didn’t have to use removable media at any point, but we can do better, I think.
Part four: Configuring configuration
I did say I wanted to automate the install, and to achieve that there are three main things we’ll need to do:
- Make a menu entry in our GRUB configuration file that tells the installer to use a preseed file.
- Create a template for said preseed file
- Write a task to put that preseed file in the right location.
Menu entry
So, starting with item one, we add this to our GRUB configuration file template inside the loop:
{% if item.value.preseed %}
menuentry "{{ item.value.label }} (Automated setup)" {
 set gfxpayload=keep
 linux /{{ item.key }}/{{ item.value.kernel }} {{ item.value.args }} automatic-ubiquity url=http://{{ lookup('dig', inventory_hostname) }}/{{ item.key }}/{{ item.key }}.seed
 initrd /{{ item.key }}/{{ item.value.initrd }}
}
{% endif %}
It’s almost identical to the other entry, except at the end it adds the parameters automatic-ubiquity and a URL parameter, pointing at the PXE server’s IP address, and the preseed file we’re about to deploy. In practice, this template results in something like this:
menuentry "Linux Mint 22 (Automated setup)" {
 set gfxpayload=keep
 linux /mint/vmlinuz boot=casper initrd=/casper/initrd.lz username=mint hostname=mint quiet splash ip=dhcp netboot=url url=http://pxe.uranus.sks.lan/os/Linux/linuxmint-22-xfce-64bit.iso -- automatic-ubiquity url=http://10.1.3.83/mint/mint.seed
 initrd /mint/initrd.lz
}
Preseed files
So let’s talk about preseed files for a minute. What exactly is a preseed file, you may be thinking? Well, this is only applicable for Debian derivatives - Debian, Mint, Ubuntu, presumably Devuan - but the package manager, dpkg, keeps a database of user-supplied configuration, called the debconf database. Packages can use this to configure themselves without needing users to go in and edit the specific package’s configuration. Two such packages are the Debian installer, and Ubiquity, which is the installer used on Mint.
We can make a plain text file, called a preseed file, in the right format for debconf, and tell our live image to load it on boot. Then, when the installer runs, it can pull the answers to questions from the debconf database, rather than asking the user.
The exact parameters and values depend on which distro you’re installing, but the procedure is mostly the same. Let’s go through the ones for Mint in the same order as it asks during the install.
The first thing we want to do is to tell debconf to ask as few questions as possible, with these two lines here.
# Setting installer to not ask questions
d-i debconf/frontend select Noninteractive
d-i debconf/priority select critical
Then, we’re going to automatically select Australian English as the language and location. I’m pretty sure you don’t need both the top and bottom half here, but I do both so I know it’s selected.
### Localization
# only necessary to set installer language
d-i localechooser/languagelist select en
## Preseeding only locale sets language, country and locale.
d-i debian-installer/locale string en_AU.UTF-8
d-i localechooser/supported-locales multiselect en_US.UTF-8
# The values can also be preseeded individually for greater flexibility.
d-i debian-installer/language string en
d-i debian-installer/country string AU
Then we’ll select the baseline US keyboard layout, because that’s what I’m using.
# Keyboard selection.
d-i console-setup/ask_detect boolean false
# (Necessary under Mint and Ubuntu, as otherwise User will still be asked for layout and variant)
d-i keyboard-configuration/layoutcode string us
# choosing default variant with this layout code
d-i keyboard-configuration/variantcode string
# d-i keyboard-configuration/toggle select No toggling
d-i keyboard-configuration/xkb-keymap select us
After that we’ll tell the installer to just use whatever network it finds and not to bother the user about it.
# netcfg will choose an interface that has link if possible. This makes it
# skip displaying a list if there is more than one interface.
d-i netcfg/choose_interface select auto
d-i netcfg/get_domain string {{ ansible_domain }}
# Disable that annoying WEP key dialog.
d-i netcfg/wireless_wep string
These lines do the equivalent of checking the box to install the extra nonfree media codecs.
### Enabling nonfree software
ubiquity ubiquity/use_nonfree boolean true
ubiquity ubiquity/download_updates boolean true
d-i hw-detect/load_firmware boolean true
The Debian preseed infrastructure includes extensive provisions for automating disk partitioning. However, doing so on my network would be unwise given how different most of my machines are. As such, I’m not going to specify anything for it.
The next page in the installer after disk partitioning was the timezone, so we can set that with these lines.
### Clock and time zone setup
d-i clock-setup/utc boolean true
d-i time/zone string Australia/Brisbane
d-i clock-setup/ntp boolean true
Setting up user accounts can also be fully automated, but as I want to be able to set the machine’s hostname, which is also on the same page, I’m going to skip specifying a password here and type it in at install time.
### Account setup
# To create a normal user account.
d-i passwd/user-fullname string Izaya
d-i passwd/username string izaya
# Normal user's password, either in clear text
#d-i passwd/user-password password
#d-i passwd/user-password-again password
# or encrypted using a crypt(3) hash.
#d-i passwd/user-password-crypted password
For those playing along at home, that’s all the questions the installer asks. However, as a bonus, you can specify some extra commands to run during/after the installation, so I can tell it to grab my SSH public keys and for the new user, and to install some extra software.
ubiquity ubiquity/success_command string \
mkdir -p /target/home/izaya/.ssh \
wget https://sso.shadowkat.net/cgi-bin/sshkeys.cgi?uid=izzy -O /target/home/izaya/.ssh/authorized_keys \
chown -R 1000:1000 /target/home/izaya/.ssh \
chmod 700 /target/home/izaya/.ssh \
chmod 600 /target/home/izaya/.ssh/authorized_keys

d-i pkgsel/include string openssh-server auto-apt-proxy;
Finally, we can tell the installer to reboot without asking when the installation is complete.
d-i finish-install/reboot_in_progress note
Deploying the preseed file
Then we just have to add a task to our pxe role to deploy the preseed files, and our job is done!
- name: Template preseed configurations
  template:
    src: custom.seed.j2
    dest: "/var/tftp/{{ item.key }}/{{ item.key }}.seed"
    owner: root
    group: root
    mode: "644"
  loop: "{{ pxe_images | dict2items }}"
Part five: Automated Mint installation
To test our new semi-automatic installation, we can repeat the procedure from before and boot the computer to the GRUB menu over the network.

When we select this, after about a minute it will take us straight to the installer, and indeed straight to the question about how to partition the disk, without even bothering to set a desktop background.
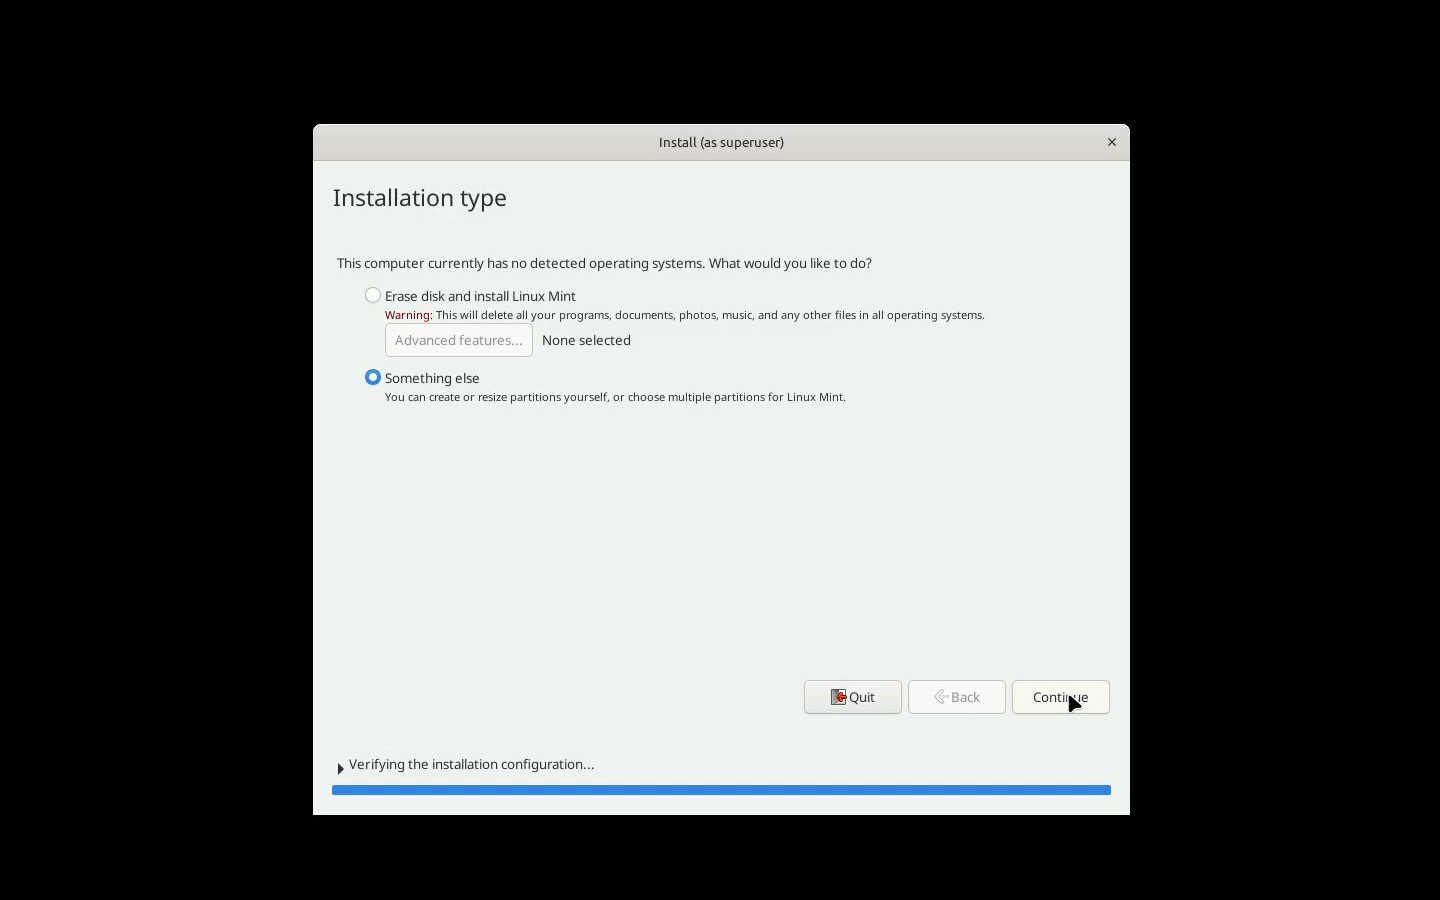
So we can repeat the steps from last time, and repartition the disk as we like it.
The user setup page will be partially filled, so I can skip some fields.
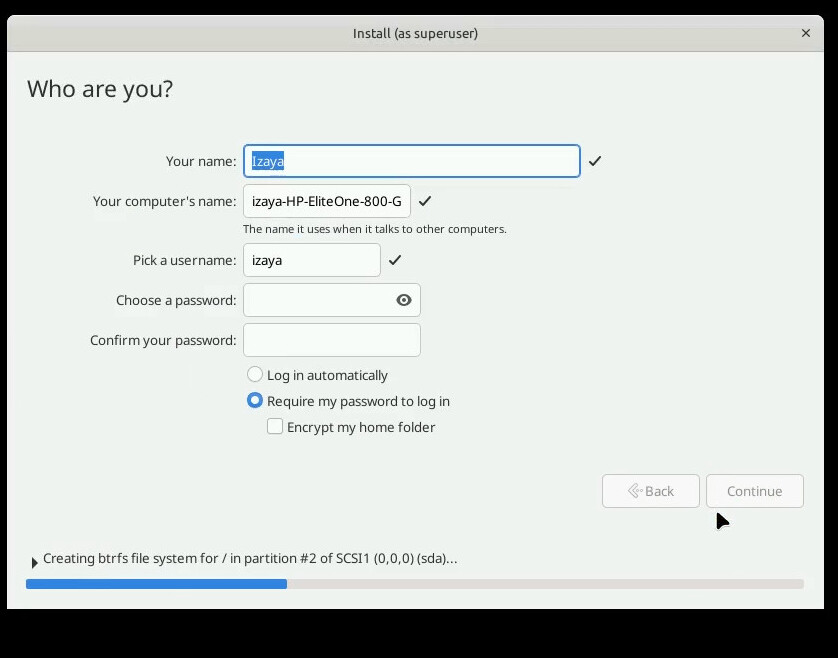
After filling them in and hitting continue, the install runs and the computer reboots without any further interaction.
Because the preseed file also pulls in my SSH keys and sets up the OpenSSH server, I’ll be able to do further setup with ansible remotely, without having to do any further configuration on the machine directly. That’s managed to condense 8 pages of questions, and a non-zero amount of after-installation setup, into partitioning the disk and filling in a hostname and password.


